您可以使用Docker,快速部署启动软件应用,在容器中,您可以直接使用连接串访问部署于宿主机上的PostgreSQL/Redis数据库。
- PgAdmin4 : 一个用于管理PostgreSQL数据库实例的GUI工具
- PGWeb:一个自动根据PG数据库模式生成后端API服务的工具
- PostgREST:一个自动根据PG数据库模式生成后端API服务的工具
- ByteBase : 一个用于进行PostgreSQL模式变更的GUI工具
- Jupyter Lab:一个开箱即用的数据分析与处理Python实验环境
您也可以用Docker拉起一些开箱即用的开源软件服务:
您也可以使用Docker执行一些随用随抛的命令工具,例如:
您也可以用Docker拉起一些开箱即用的开源软件服务:
- Gitlab:开源代码托管平台。
- Habour:开源镜像仓库
- Jira:开源项目管理平台。
- Confluence:开源知识托管平台。
- Odoo:开源ERP
- Mastodon:基于PG的社交网络
- Discourse:基于PG与Redis的开源论坛
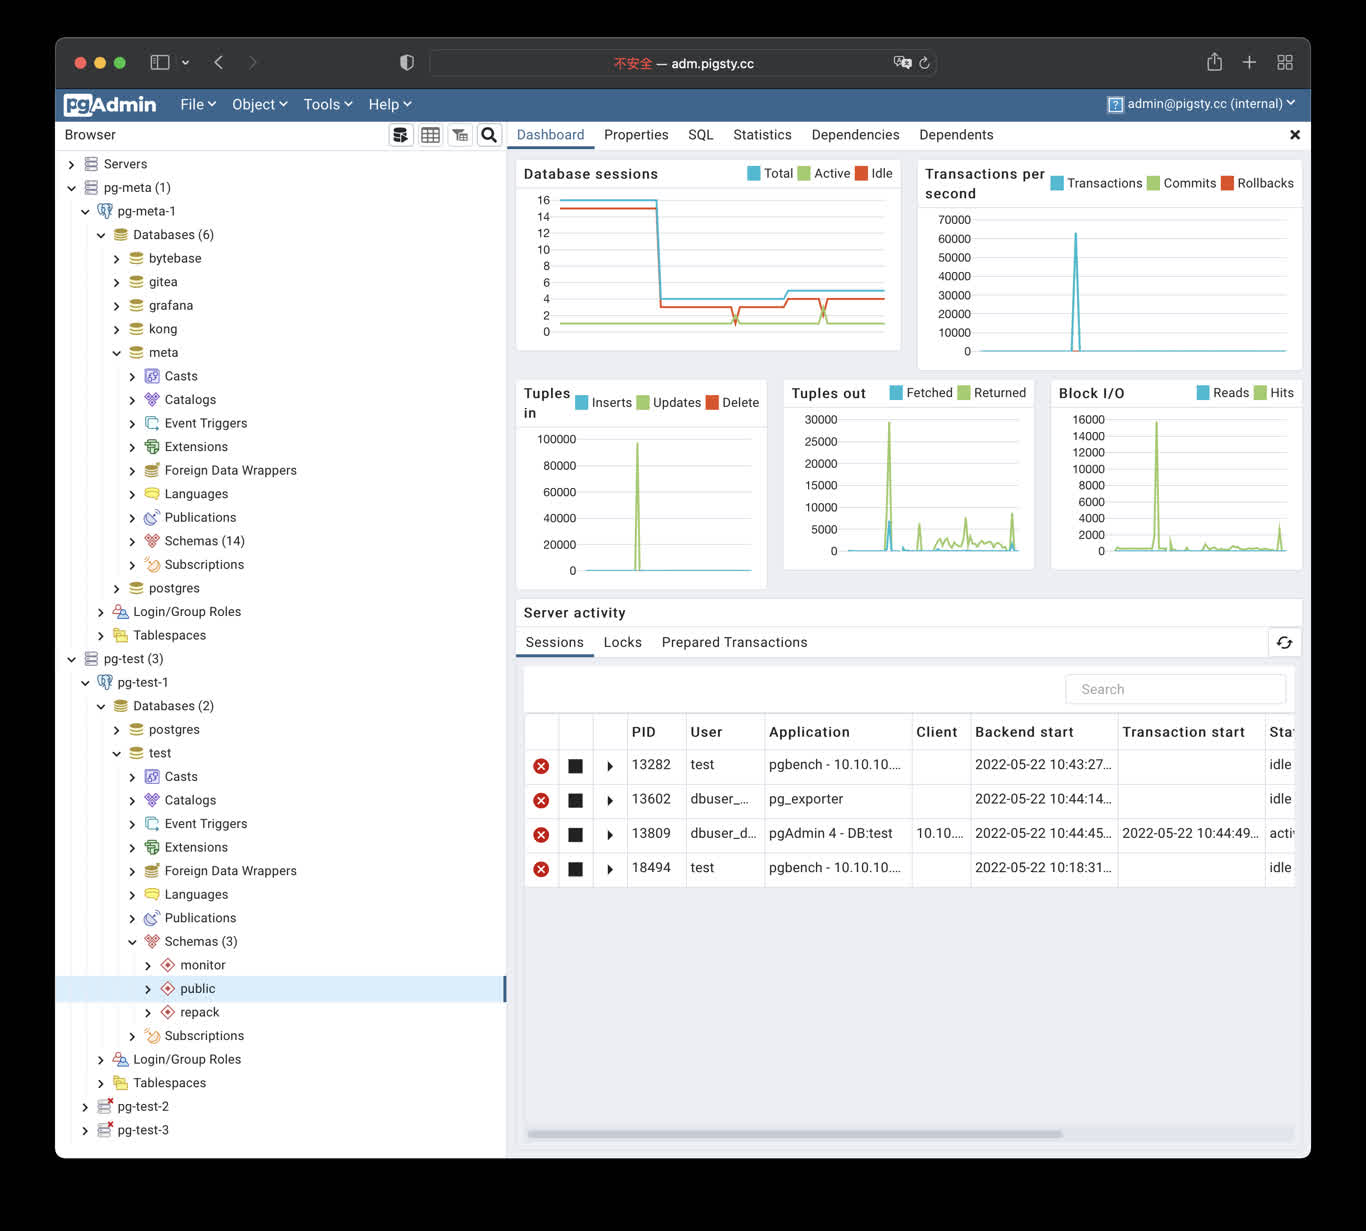
PGADMIN
PgAdmin4 是一个实用的PostgreSQL管理工具,执行以下命令可在管理节点拉起 pgadmin服务:
cd ~/pigsty/app/pgadmin ; docker-compose up -d
默认分配 8885 端口,使用域名: http://adm.pigsty 访问, Demo:http://adm.pigsty.cc。
默认用户名:admin@pigsty.cc,密码:pigsty。
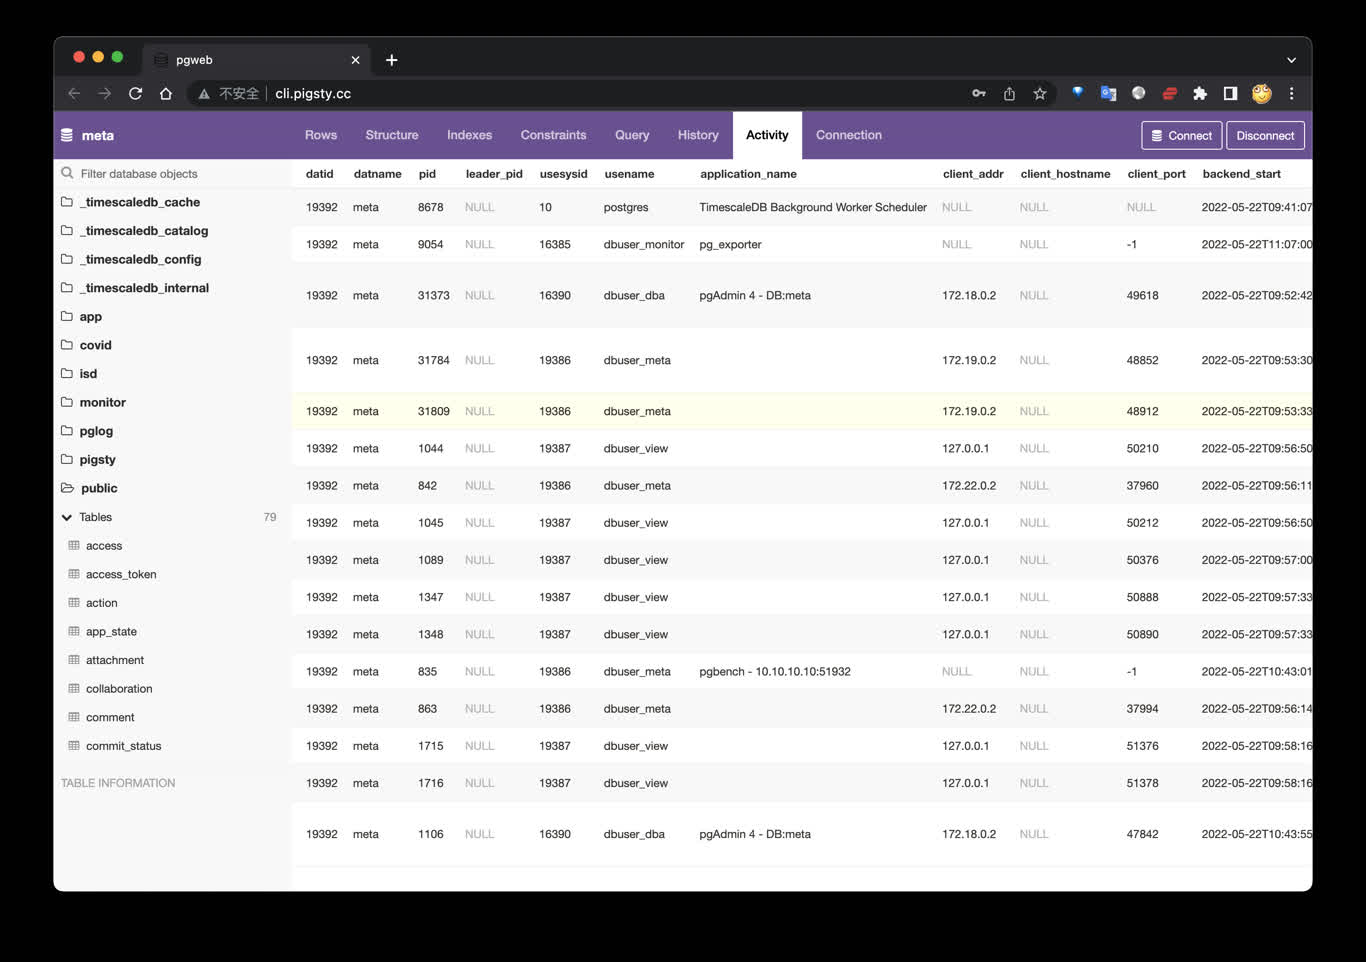
PGWeb客户端工具
PGWeb是一款基于浏览器的PG客户端工具,使用以下命令,在元节点上拉起PGWEB服务,默认为主机8886端口。可使用域名: http://cli.pigsty 访问,公开Demo:http://cli.pigsty.cc。
# docker stop pgweb; docker rm pgweb
docker run --init --name pgweb --restart always --detach --publish 8886:8081 sosedoff/pgweb
用户需要自行填写数据库连接串,例如默认CMDB的连接串:
postgres://dbuser_dba:DBUser.DBA@10.10.10.10:5432/meta?sslmode=disable
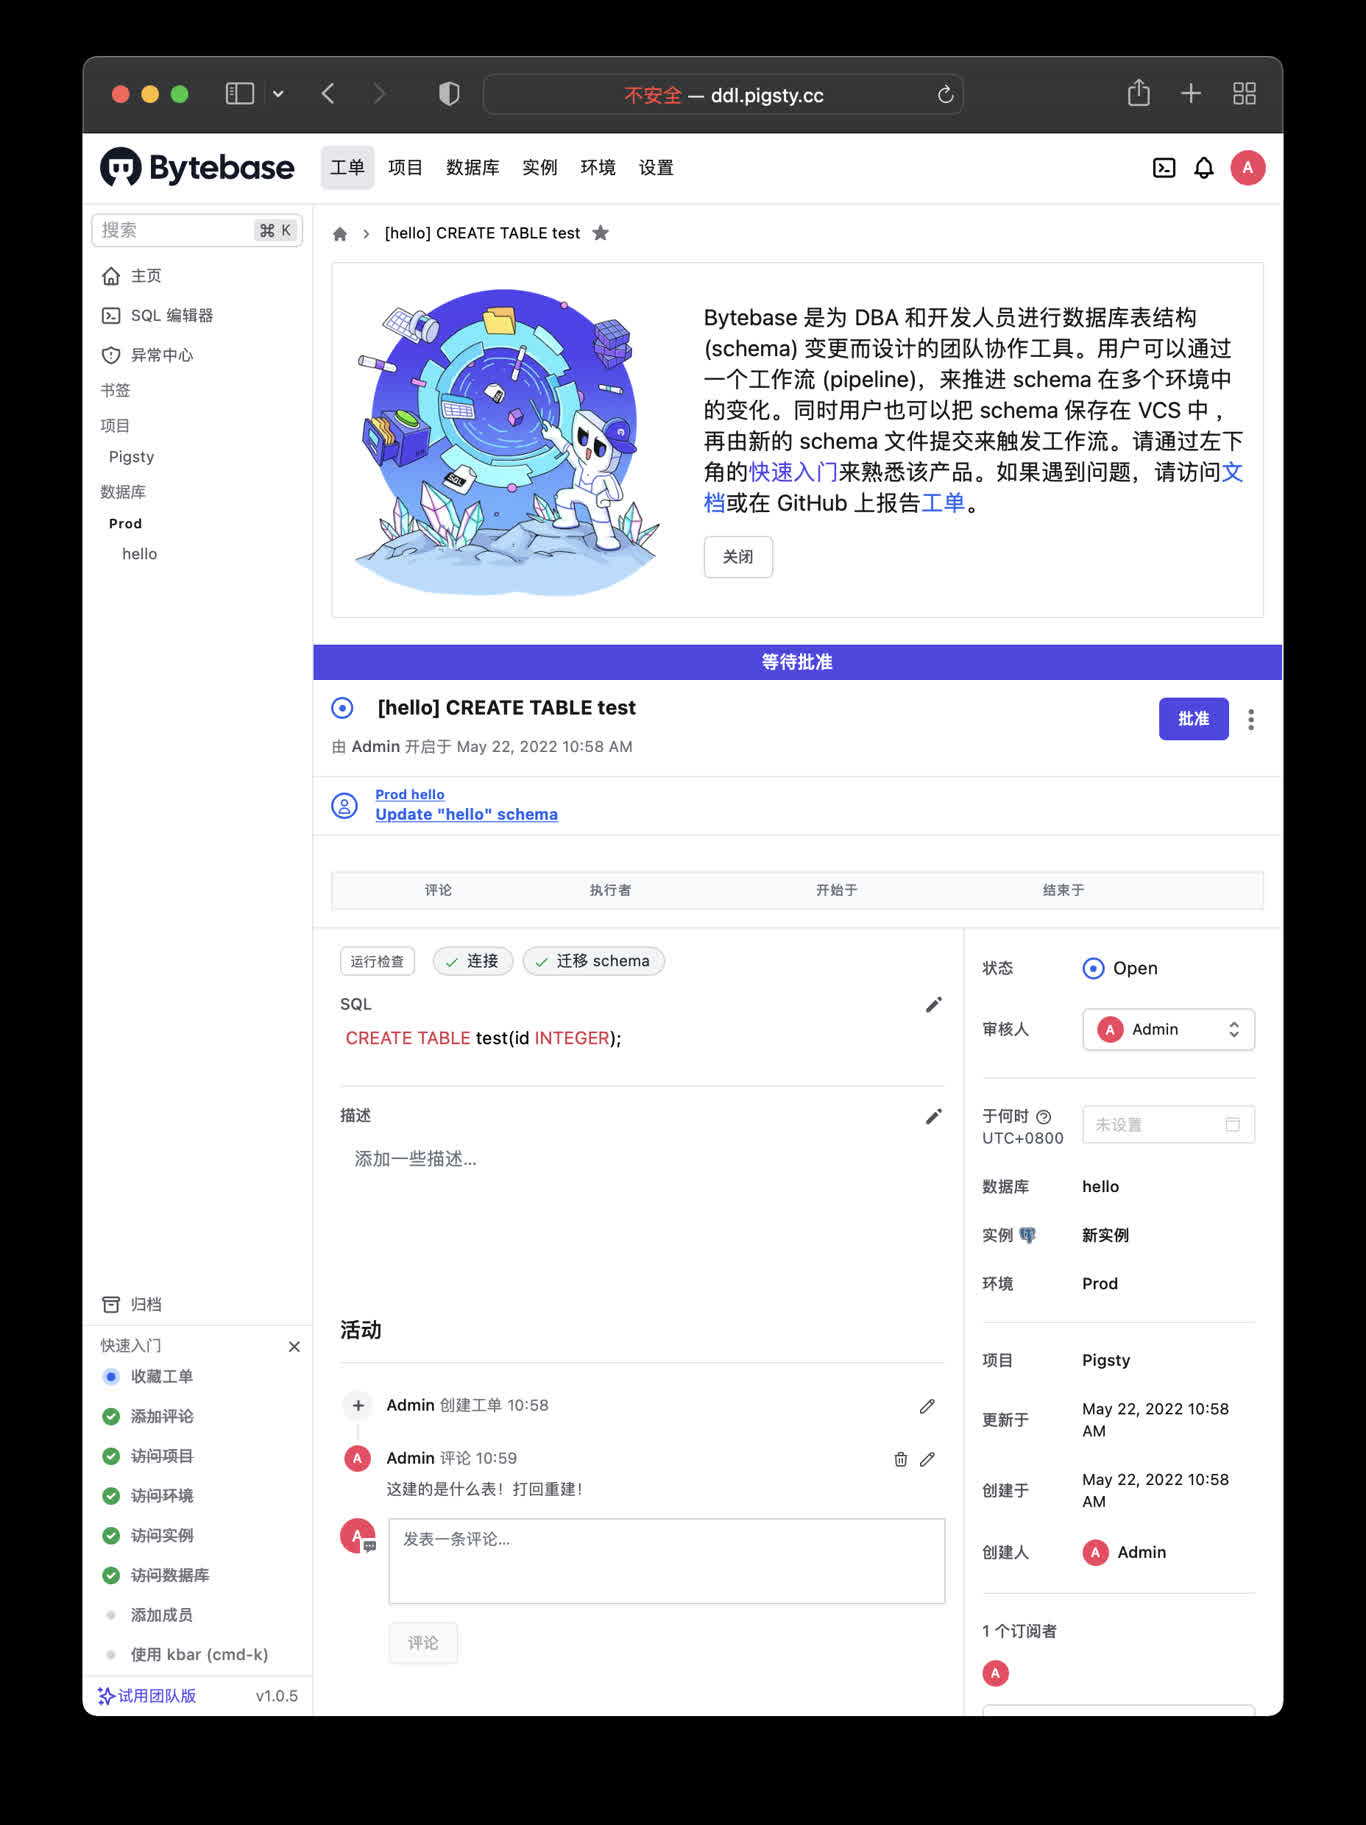
ByteBase
ByteBase是一个进行数据库模式变更的工具,以下命令将在元节点 8887 端口启动一个ByteBase。
mkdir -p /data/bytebase/data;
docker run --init --name bytebase --restart always --detach --publish 8887:8887 --volume /data/bytebase/data:/var/opt/bytebase \
    bytebase/bytebase:1.0.4 --data /var/opt/bytebase --host http://ddl.pigsty --port 8887
访问 http://10.10.10.10:8887/ 或 http://ddl.pigsty 即可使用 ByteBase,您需要依次创建项目、环境、实例、数据库,即可开始进行模式变更。 公开Demo地址: http://ddl.pigsty.cc
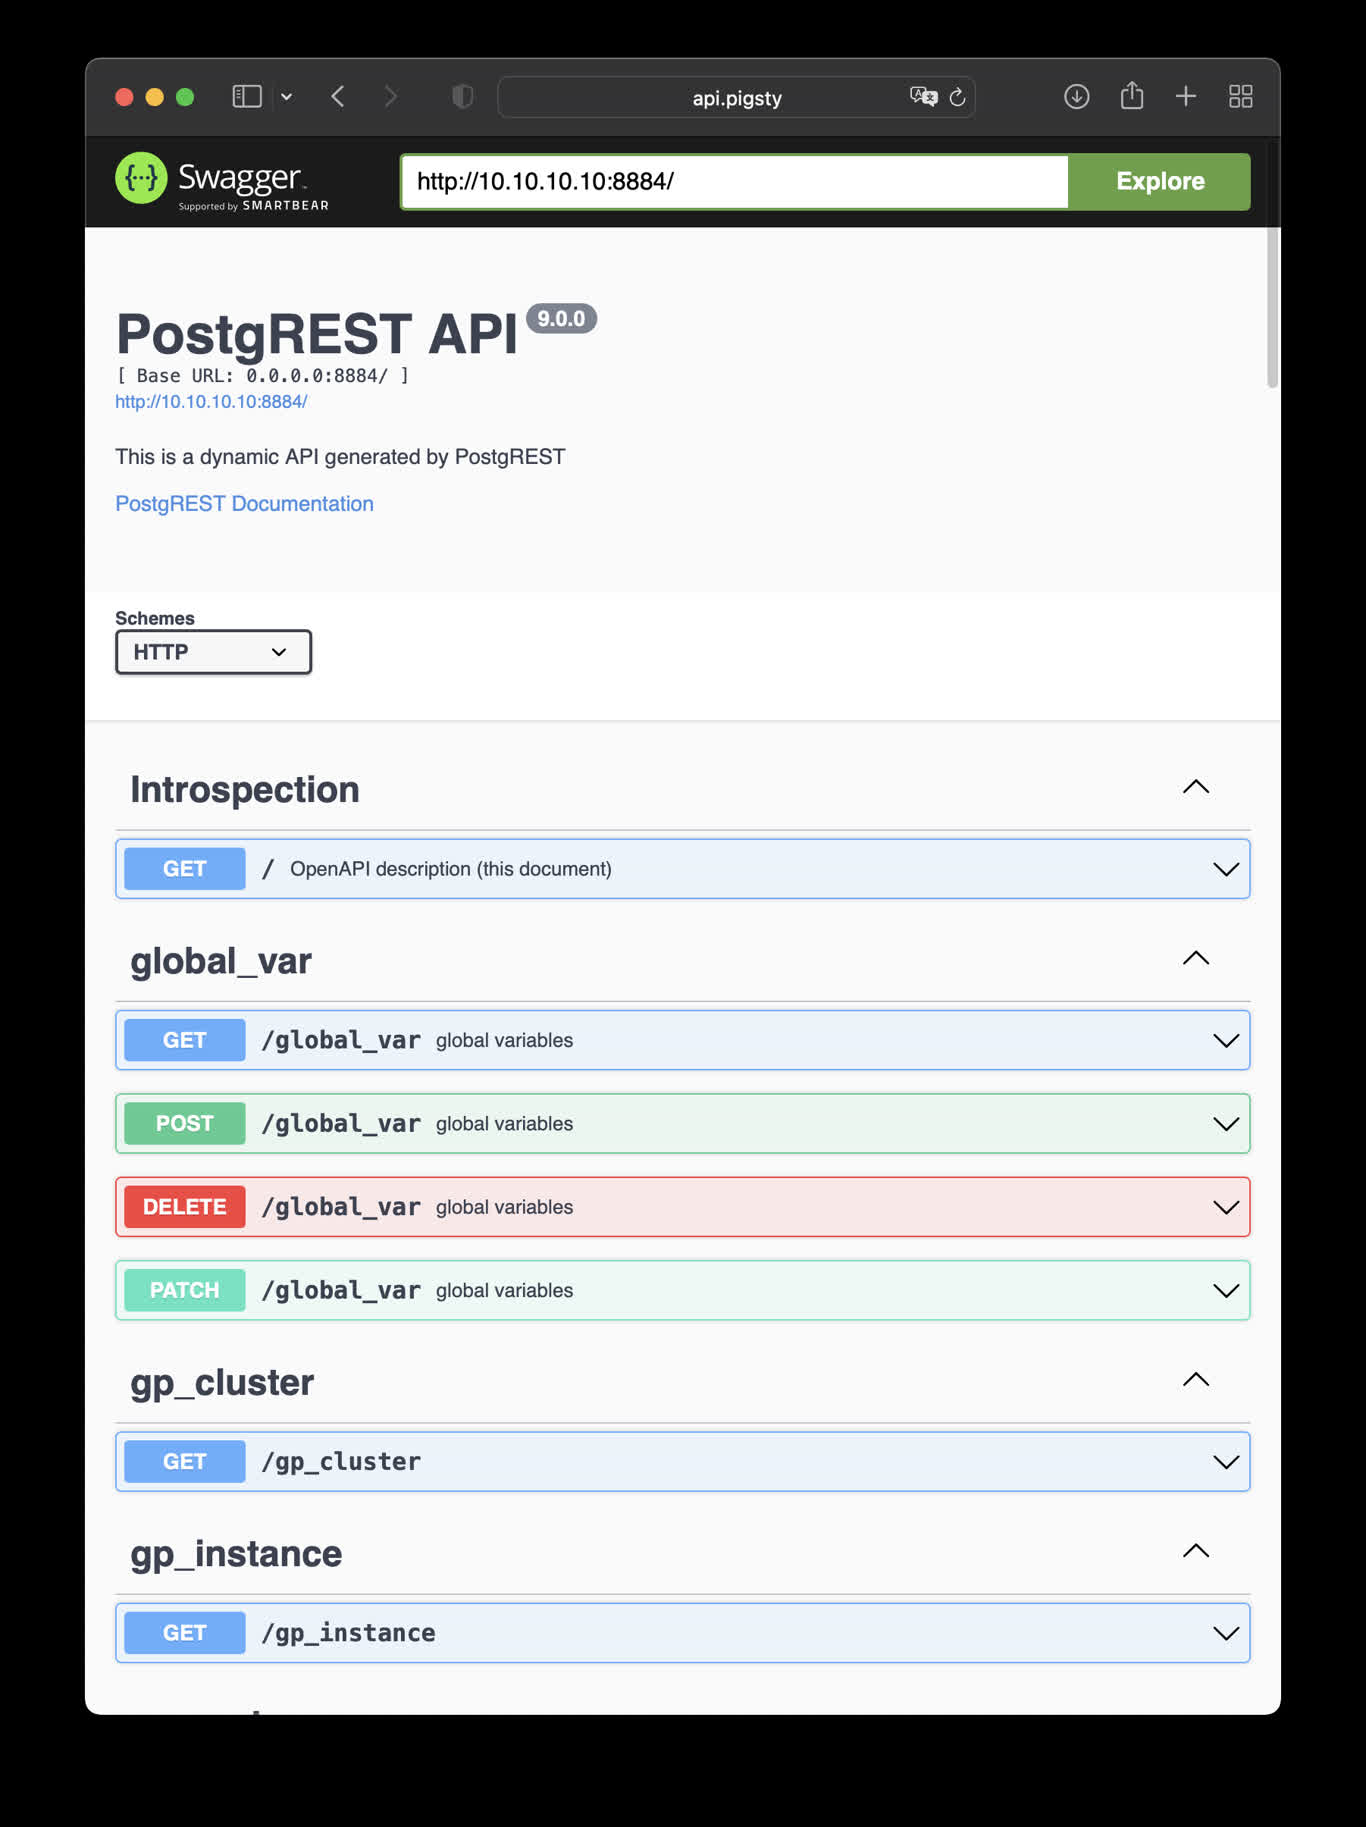
PostgREST
PostgREST是一个自动根据 PostgreSQL 数据库模式生成 REST API的二进制组件。
例如,以下命令将使用docker拉起 postgrest (本地 8884 端口,使用默认管理员用户,暴露Pigsty CMDB模式)
docker run --init --name postgrest --restart always --detach --publish 8884:8081 postgrest/postgrest
访问 http://10.10.10.10:8884 会展示所有自动生成API的定义,并自动使用 Swagger Editor 暴露API文档。
如果您想要进行增删改查,设计更精细的权限控制,请参考 Tutorial 1 - The Golden Key,生成一个签名JWT。
数据分析环境:Jupyter
Jupyter Lab 是一站式数据分析环境,下列命令将在 8887 端口启动一个Jupyter Server.
docker run -it --restart always --detach --name jupyter -p 8888:8888 -v "${PWD}":/tmp/notebook jupyter/scipy-notebook
docker logs jupyter # 打印日志,获取登陆的Token
访问 http://10.10.10.10:8888/ 即可使用 JupyterLab,(需要填入自动生成的Token)。
您也可以使用 infra-jupyter.yml 在管理节点裸机上启用Jupyter Notebook。
样例:数据库模式报表SchemaSPY
使用以下docker生成数据库模式报表,以CMDB为例:
docker run -v /www/schema/pg-meta/meta/pigsty:/output andrewjones/schemaspy-postgres:latest -host 10.10.10.10 -port 5432 -u dbuser_dba -p DBUser.DBA -db meta -s pigsty
然后访问 http://pigsty/schema/pg-meta/meta/pigsty 即可访问Schema报表
样例:开源代码仓库:Gitlab
请参考Gitlab Docker部署文档 完成Docker部署。
export GITLAB_HOME=/data/gitlab

sudo docker run --detach \
  --hostname gitlab.example.com \
  --publish 443:443 --publish 80:80 --publish 23:22 \
  --name gitlab \
  --restart always \
  --volume $GITLAB_HOME/config:/etc/gitlab \
  --volume $GITLAB_HOME/logs:/var/log/gitlab \
  --volume $GITLAB_HOME/data:/var/opt/gitlab \
  --shm-size 256m \
  gitlab/gitlab-ee:latest

sudo docker exec -it gitlab grep 'Password:' /etc/gitlab/initial_root_password
样例:开源技术论坛:Discourse
搭建开源论坛Discourse,需要调整配置 app.yml ,重点是SMTP部分的配置
Discourse配置样例
templates:
  - "templates/web.china.template.yml"
  - "templates/postgres.template.yml"
  - "templates/redis.template.yml"
  - "templates/web.template.yml"
  - "templates/web.ratelimited.template.yml"
## Uncomment these two lines if you wish to add Lets Encrypt (https)
# - "templates/web.ssl.template.yml"
# - "templates/web.letsencrypt.ssl.template.yml"
expose:
  - "80:80"   # http
  - "443:443" # https
params:
  db_default_text_search_config: "pg_catalog.english"
  db_shared_buffers: "768MB"
env:
  LC_ALL: en_US.UTF-8
  LANG: en_US.UTF-8
  LANGUAGE: en_US.UTF-8
  EMBER_CLI_PROD_ASSETS: 1
  UNICORN_WORKERS: 4
  DISCOURSE_HOSTNAME: forum.pigsty
  DISCOURSE_DEVELOPER_EMAILS: 'fengruohang@outlook.com,rh@vonng.com'
  DISCOURSE_SMTP_ENABLE_START_TLS: false
  DISCOURSE_SMTP_AUTHENTICATION: login
  DISCOURSE_SMTP_OPENSSL_VERIFY_MODE: none
  DISCOURSE_SMTP_ADDRESS: smtpdm.server.address
  DISCOURSE_SMTP_PORT: 80
  DISCOURSE_SMTP_USER_NAME: no_reply@mail.pigsty.cc
  DISCOURSE_SMTP_PASSWORD: "<password>"
  DISCOURSE_SMTP_DOMAIN: mail.pigsty.cc
volumes:
  - volume:
      host: /var/discourse/shared/standalone
      guest: /shared
  - volume:
      host: /var/discourse/shared/standalone/log/var-log
      guest: /var/log

hooks:
  after_code:
    - exec:
        cd: $home/plugins
        cmd:
          - git clone https://github.com/discourse/docker_manager.git
run:
  - exec: echo "Beginning of custom commands"
  # - exec: rails r "SiteSetting.notification_email='no_reply@mail.pigsty.cc'"
  - exec: echo "End of custom commands"
然后,执行以下命令,拉起Discourse即可。
./launcher rebuild app